Introduction
Mastering how to switch the band on your Apple Watch can transform both its look and functionality. With the right steps, changing your Apple Watch band becomes an easy task, allowing you to personalize your device to match your style or activity. In this comprehensive guide, we’ll walk you through the process of removing and replacing your Apple Watch band efficiently and safely.
Understanding the Apple Watch Band Mechanism
The Apple Watch band system is ingeniously designed to allow for quick and secure changes. Each Apple Watch, whether you own the Apple Watch Series 9 or another model, employs a band release mechanism that facilitates seamless swapping. This system ensures all bands fit perfectly, maintaining the watch’s appearance and comfort.
Overview of the Band Release System
Apple’s band release system features release buttons located on the back of the watch. These buttons are integral to switching bands, as pressing them allows the current band to slide out effortlessly and enables the new band to lock into place securely.
Types of Apple Watch Bands and Their Attachments
Apple offers a variety of bands, from sport bands to luxury leather and metal options, each offering unique features and aesthetics. While having different properties, every band shares the compatible attachment design, allowing easy switch out regardless of the material.
Preparing to Change Your Apple Watch Band
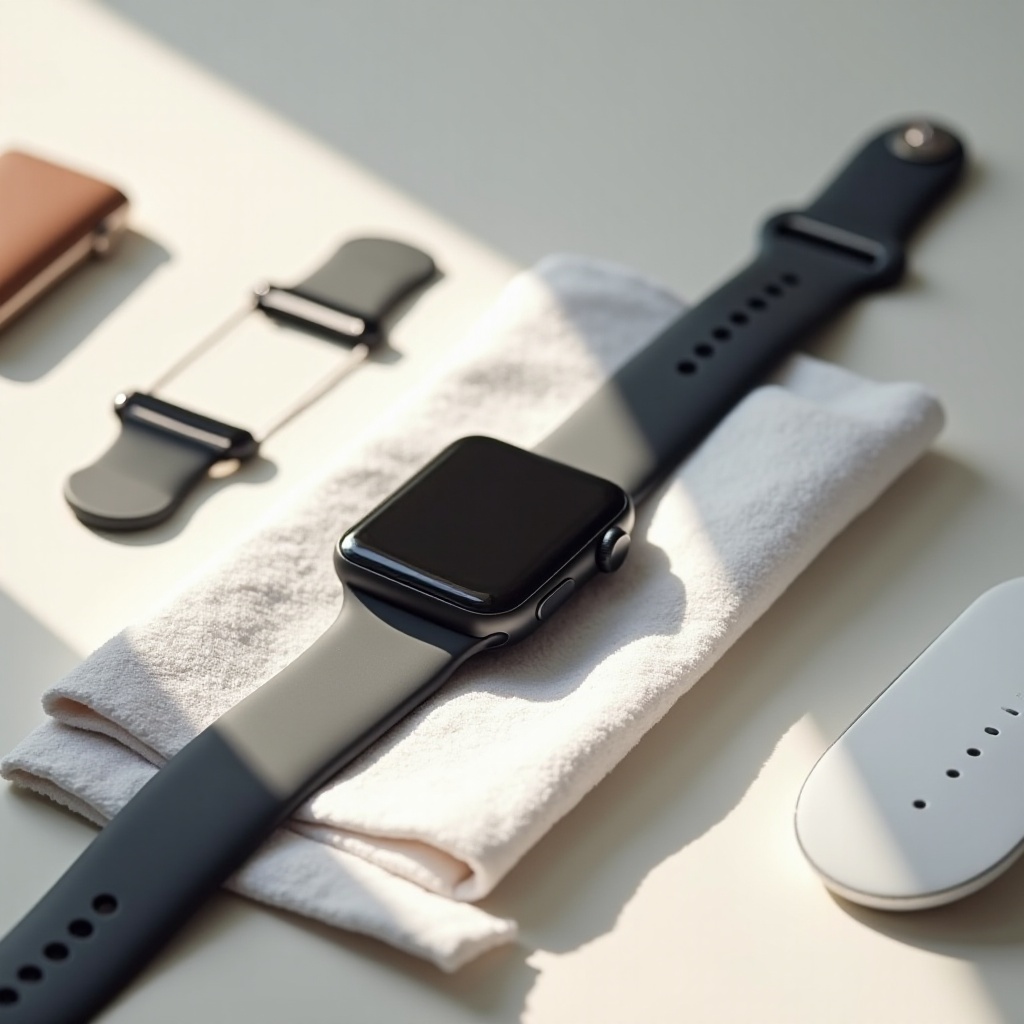
Before you begin removing the current band, setting up the right environment is crucial. This includes an appropriate workspace setup and taking simple precautions.
Necessary Tools and Precautions
Typically, you don’t need special tools to change an Apple Watch band. However, ensure you have a clean, flat surface to work on, free from any potential obstructions to the band mechanism. Placing a soft, lint-free cloth underneath the watch can protect it from scratches and provide better control during the band change process.
Setting Up Your Workspace
Clear away distractions and ensure you have ample lighting. This not only helps in clearly seeing the band attachments but also plays a role in avoiding accidental damage to either the watch or the band.
Step-by-Step Guide to Removing Your Apple Watch Band
Follow these simple yet detailed steps to remove the Apple Watch band. The process is straightforward, but taking care to follow each step will ensure a smooth transition.
- Turn your Apple Watch over: Lay it face-down on a secure, soft surface.
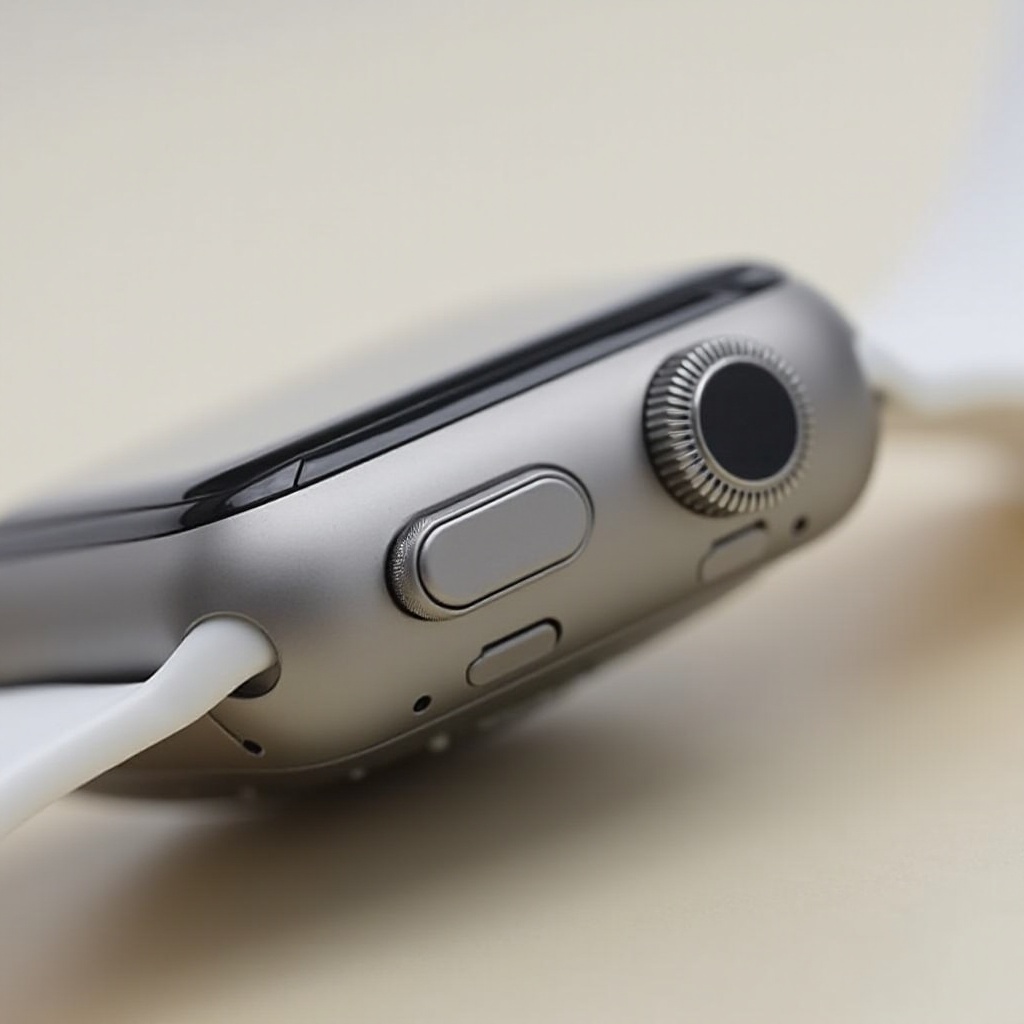
- Locate the band release buttons: These buttons are situated at either end of the band on the back of the watch.
- Press and hold the release button: Use your fingertip or nail to press the button firmly.
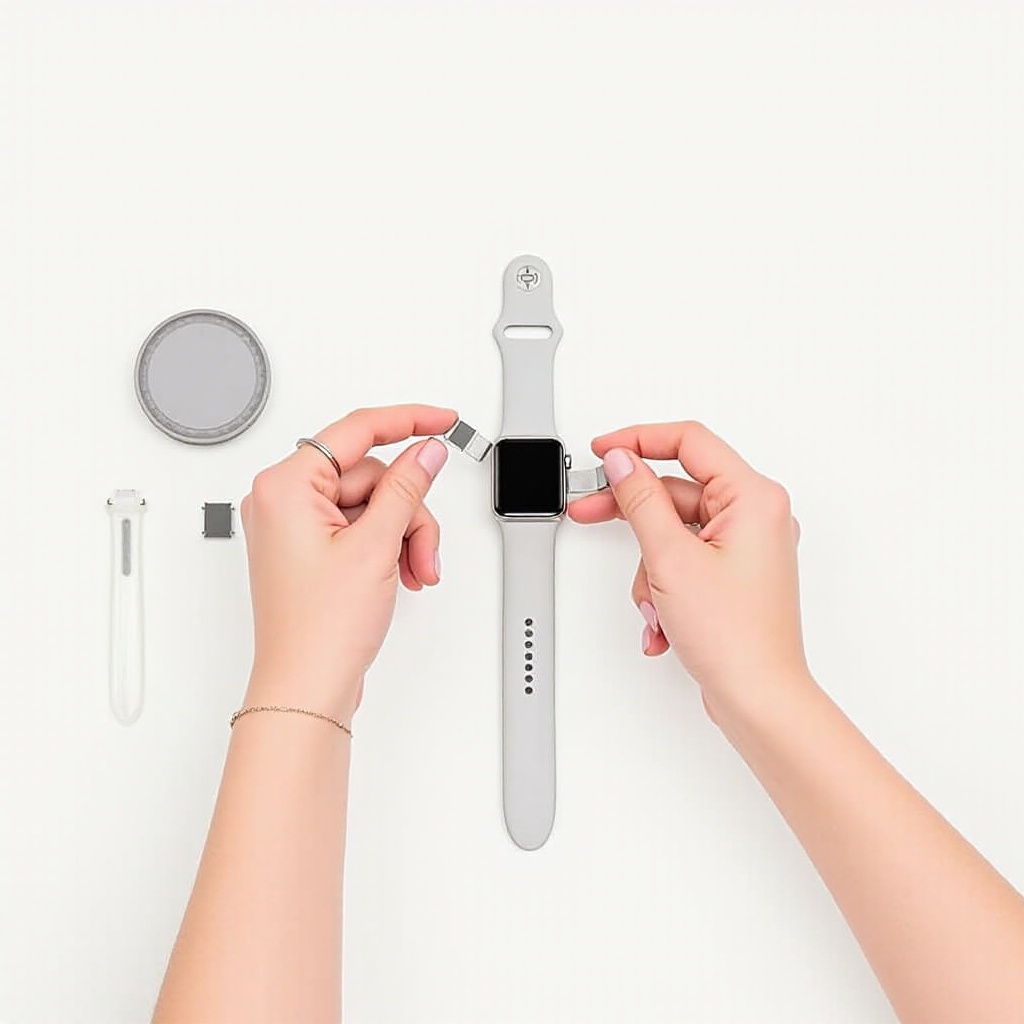
- Slide the band across: While pressing the button, slide the band outward—it should come off easily.
- Repeat for the other part of the band: Execute the same process for the other half of the band.
Troubleshooting Common Removal Issues
If the band seems stuck, ensure the button is fully depressed as grit or debris could block the mechanism. Cleaning the button gently with a soft brush may help free it, allowing for smoother transitions.
How to Install a New Apple Watch Band
With the old band successfully removed, installing a new band becomes a simple reversal of the removal procedure. Ensuring a secure fit is equally important.
Aligning the New Band Correctly
- Begin by selecting the new band half, aligning it with the corresponding watch slot.
- Slide the band into the slot: Move it in until you hear a soft click, indicating it is locked in place.
- Repeat with the other half: Confirm each side is tightly secured by gently tugging each end.
Ensuring the New Band is Secure and Locked
After confirming the band’s placement, test the watch by wearing it and lightly pulling on the band to ensure it doesn’t slide out without pressing the release button. This guarantees your watch is secure during both movement and rest.
Tips for Maintaining Your Apple Watch Bands
Proper maintenance of your bands can significantly extend their lifespan and preserve their appearance, ensuring your watch remains fashionable and functional.
Cleaning and Caring for Different Band Materials
- For silicone and fluoroelastomer bands, a wipe with a dampened, lint-free cloth can eliminate dirt and sweat efficiently.
- Leather bands should be treated with a dry cloth to remove dust and kept away from water to prevent damage.
- Stainless steel or metal bands can be cleaned with a lightly moistened cloth to remove smudges without tarnishing them.
Best Practices for Longevity and Comfort
Rotate between bands regularly, allowing each to rest and recover from daily wear. This practice also allows the bands to maintain their comfort and flexibility. Keep all bands away from chemicals, excessive heat, and direct sunlight to prevent unwanted wear and tear.
Conclusion
Changing the band on your Apple Watch is a simple yet rewarding task that adds versatility to your wearable device. With the proper guidance provided in this article, you’re empowered to switch your Apple Watch bands confidently whenever a new style or activity calls for it.
Frequently Asked Questions
How often should I change my Apple Watch band?
Change your band as often as your style or comfort preferences dictate. Frequent switches can refresh the look and feel of your watch.
What should I do if my band is stuck?
Ensure the release button is fully pressed to unstick the band. If necessary, clean the area gently to remove any debris obstructing the release.
Can I use non-Apple bands with my Apple Watch?
Yes, non-Apple bands can be used with your Apple Watch, but ensure they are designed for your specific model size for a proper fit.